
HubSpot’s sales enablement tools allow sales teams to automate follow up messaging and tasks to help stay on top of leads in a predetermined cadence. This helps with the challenge sales professionals have in following up on initial contact, knowing who to contact next, and selecting the appropriate messaging.
Sequences help ensure that consistent campaign messaging goes out and is balanced with quality and timing. Sequences are a group of template emails that are organized in the way you wish to communicate to your prospects. HubSpot allows you to personalize email messages to help deliver the most effective connection you can have.
Sequences not only automate messaging, but they assign tasks to the relevant sales person at specific times so that you can make appropriate follow up based on the last message delivered to the prospect. For example, let’s say following a week after initial contact, you want the sales person to make a specific phone call. An automated task alert can inform the sales person as part of the sequence.
And, once a prospective customer responds to an email in a sequence, they are removed from that sequence to help ensure they do not receive random messages that have nothing to do with where they are in the sales journey. Messages will appear more relevant and personalized.
When you first start creating sequences, you’ll want to have a methodology in mind. For example, what email do you want a brand-new inbound lead to see same-day vs what messaging you want them to see in a few days, in a week, and in a month. And within this sequence, think of actions that you want sales to take. For example, after a same-day email, perhaps sales should do a follow up call, or reach out on LinkedIn.
After you have mapped out your cadence and tasks, you are ready to create a sequence. The very first step to take is to generate your template emails. Then you’ll work on ordering the emails and tasks in a sequence.
[NOTE: You will require either the HubSpot Sales Starter or Service Starter Plan to access Sequences.]
How do I create a HubSpot sequence email?
1) The first step is to select a naming convention that makes sense and utilizes number sequence to help guide you (ex. Inbound_lead_1 , Inbound_lead_2 …).
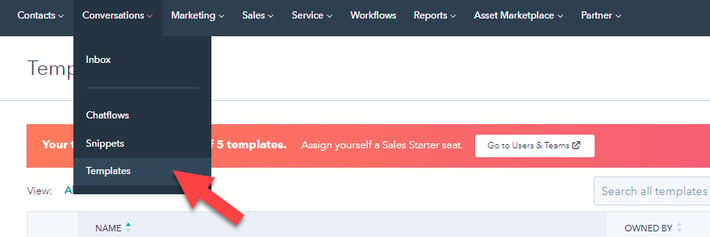
2) Go to the HubSpot Conversation > Templates

2) Create a file in HubSpot to save all your related email templates in using the “New Folder” button.
3) Next create the sequence email. Go to the top navigation and select “Conversations” > “Templates”.
4) Then select the “New Template” orange button. A drop down box will appear. Here is where you select to begin from scratch or select an email template from your library (already uploaded emails).
5) Next you will write the email.
The subject line is one of the most important components. You'll want to experiment here. There are many articles about subject lines and you'll definitely be testing and learning.
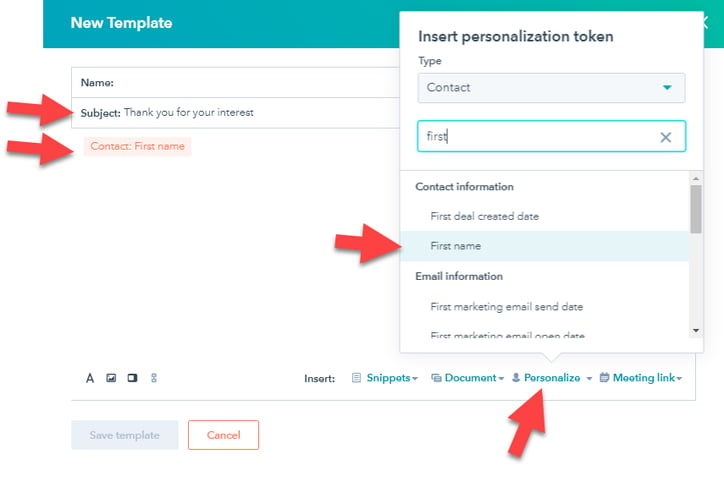
To stand out, you'll want to personalize your email. To do that, put your cursor in the body of the email and then go to the bottom and select the “Personalize” option.
A box will come up where you can select what type of information will greet the reader. You can type to search through the options - usually First Name is a good option to personalize the email to the recipient, but you can use placeholders for company name and all kinds of other customer fields if you like.
Place a comma after you have inserted the greeting.
Now you can proceed to write the body of the email.
6) If you have set up your email signature in HubSpot under your login profile, it will automatically be added to the bottom of emails you create.
7) If you have Meetings set up in HubSpot, you can add a meeting link to your emails with the click of a button, which you’ll find at the bottom next to “Personalize.”
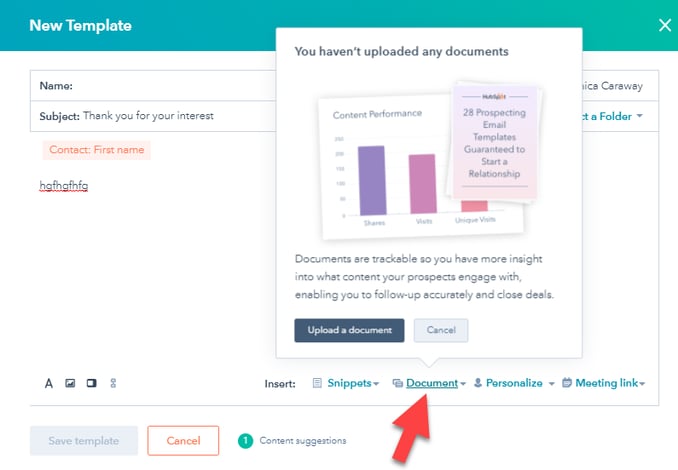
8) To include a document in your email, such as a case study, white paper, etc., select “Document” at the bottom and then “Upload a document”. The link that gets created and added is trackable, and helps prevent your email getting caught in SPAM filters.
9) Once you have all the elements you wish to include, select “Save template” at the bottom.
10) Repeat the above process again and again until you have made all the emails that you are going to include in an overall sequence.
You are now ready to create the sequence and assign emails and tasks to it.
Creating a HubSpot Sequence
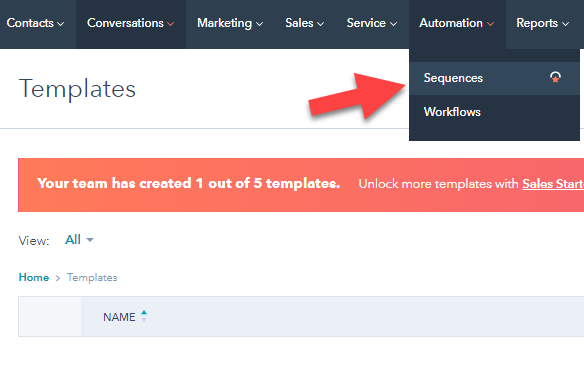
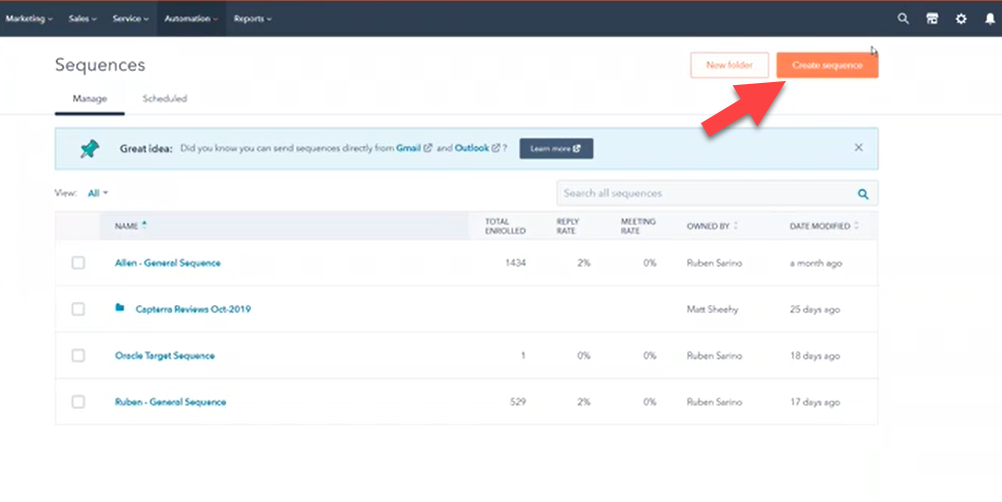
1) Go to the top dashboard and select “Automation” - “Sequences”.
2) This will take you to the Sequence Dashboard. Select the orange “Create Sequence” button.
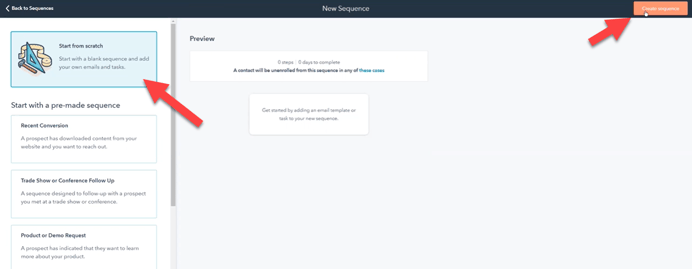
 3) This takes you to a page that has prefilled HubSpot templates you can select from on the left. Or you can select to “Start From Scratch” at the top left. We recommend the “Start from Scratch” option as the prefilled templates can be quite generic - although if you are stuck on what to write, the prefilled templates can give you some good ideas.
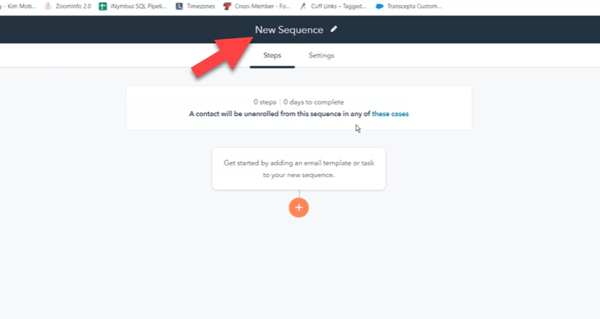
4) Name your sequence on the "New Sequence" line at the top, middle of the screen. Using a naming convention that makes sense as you will eventually have multiple sequences for a variety of purposes. (In our example we will be naming our sequence General Inbound Leads.)
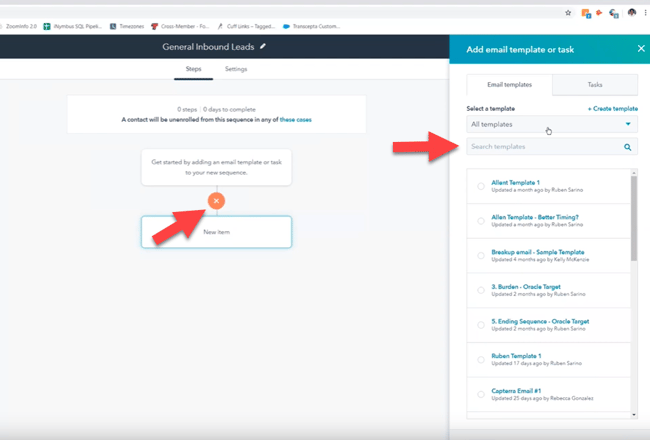
5) Click on the orange circle to start adding template emails you have created. You can use the search bar to find the folder you saved them in.
When you find the email you want to add, select it.
[NOTE: Hopefully you heeded the advice earlier in the directions to use numbering sequences in the naming of the template emails. Doing so avoids a lot of confusion when assigning them to your sequences.]
6) Now that you have added your first email to the sequence, you can select to add another email following the same processes, or select to add a task for your sales team.
To add a task, select the plus sign. And then to the right, select “Tasks”. Select from one of the tasks revealed to add to your sequence.
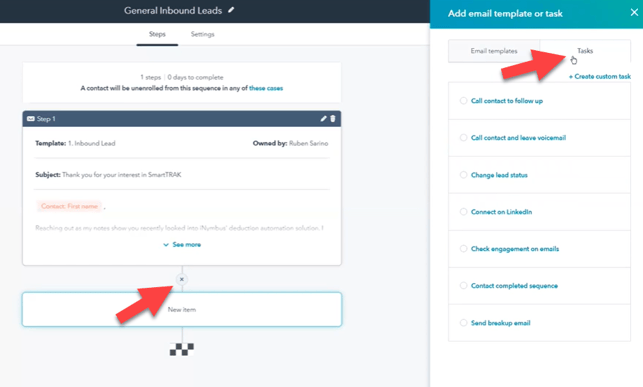
7) Repeat the process of adding emails and tasks as you deem fit.
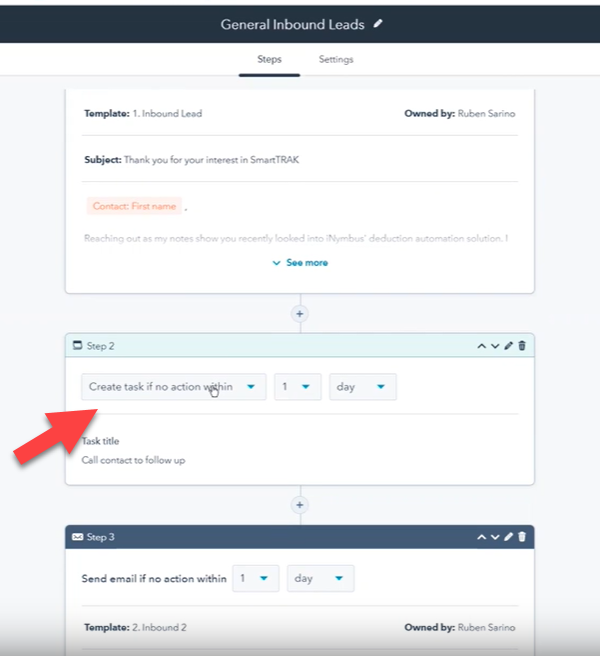
You can select when task emails are sent to sales and when emails are sent to prospects in this area.
Be sure to add value at every step- speaking about customer experience, new features, and sharing any other relevant bits of information. Keep in mind the audience and the way they found their way into your sequence. Doing this will help keep your sequence and cadence personalized to your prospect.
[NOTE: Balance your cadence with inbound leads and outbound leads differently. With inbound leads you’ll want to reach out to more frequently as they have already shown interest. With outbound leads, you’ll want to space emails/tasks out a bit so as not to harass a potential that has yet to show interest in your company/product.]
We offer the below sales enablement services for those businesses who are struggling to set up HubSpot sequences
Sales Enablement Services
- Review sales prospecting emails
- 1-2 hour sales workshop on HubSpot's sales efficiency tools
- Custom 5-9 step sequences for prospecting emails, calls, and tasks
- Setup chat or bot messaging
- Setup Sales Team Management Dashboards - track processes!
Related articles
HubSpot Sequences Vs. Workflows, What's the Difference?
11 Actionable Marketing Tactics We Learned from Inbound 2019
SEMrush Tips for Isolating Keywords
Top Snippet Placement Tips from SEMrush
Startup Marketing Technical Tasks - Website Tracking