First Place Winner, 2021 HubSpot Blog Contest and Originally Published July 28, 2021, on HubSpot.com.
If we asked you to set up an automated weekly email to your customer base using HubSpot, would you even flinch? “No problem,” you’d say. Not so fast, pardner. 🐴
Yes. It is a piece of cake 🎂 to send a weekly email newsletter using a blog RSS feed or native HubSpot blog. But go ahead and try to set up a weekly email that sends essentially the same content every week, with a few fields updated from a software API. We found ourselves surprisingly stumped.
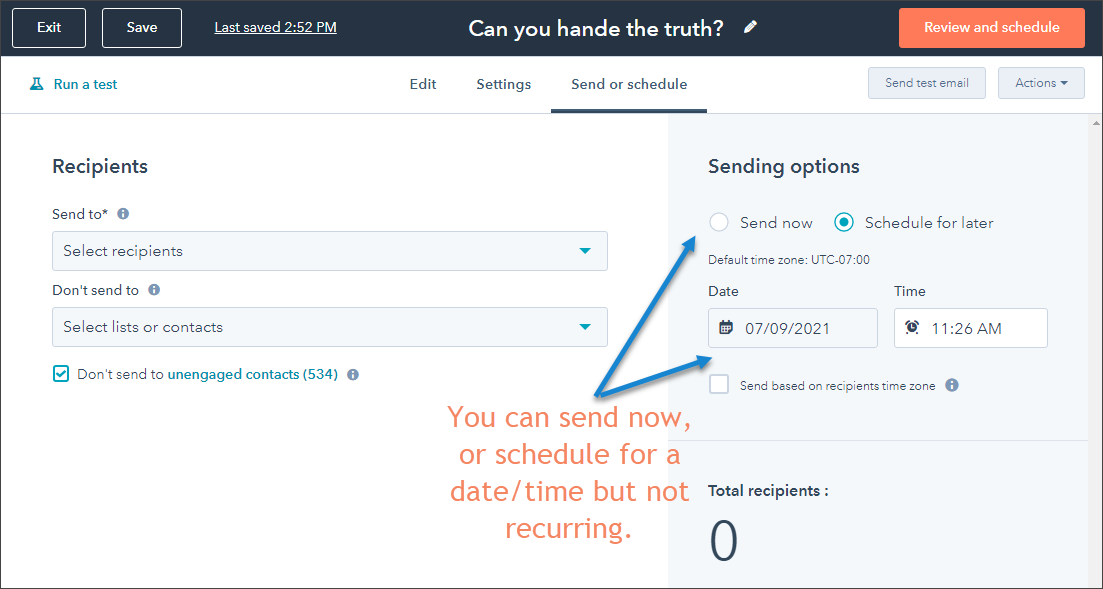
Still baffled 🤷 as to what the big deal is? Check out your scheduling options in a regular email. You can “Send Now” or “Schedule for Later” (date and time), but no options for recurring.
The answer lies with an automated email combined with workflows. Let’s save you a couple of hours (days, weeks) of playing around and show you precisely what you need to do. Special thanks go to contributors in the HubSpot Community who provided the clues. Let’s look at a real-life example.
Problem
GreenCo needs to send their customers weekly emails about Alexa notifications pushed via GreenCo’s software application. GreenCo has many custom properties set up and loaded into HubSpot daily with data they populate at the company level. This data includes application notification counts, company name, and even their customer’s company logo. GreenCo uses HubSpot’s open APIs to load the data. And, GreenCo wants the notification emails to go out once a week, on Monday precisely at 6 AM.
New Guide: The Truth About B2B Email Deliverability
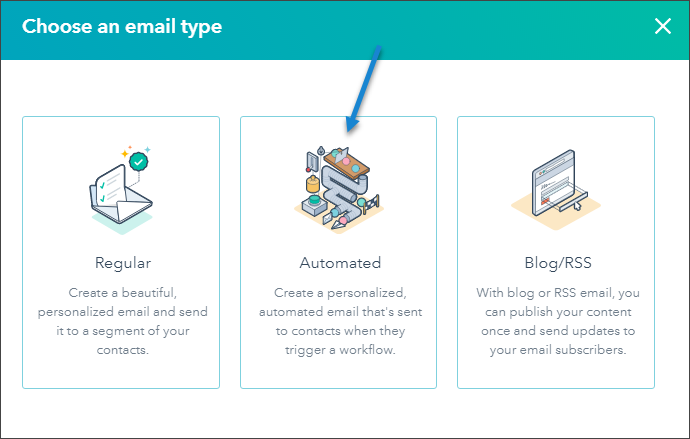
Step 1 - Set up your automated email.
Create an Automated HubSpot email type.
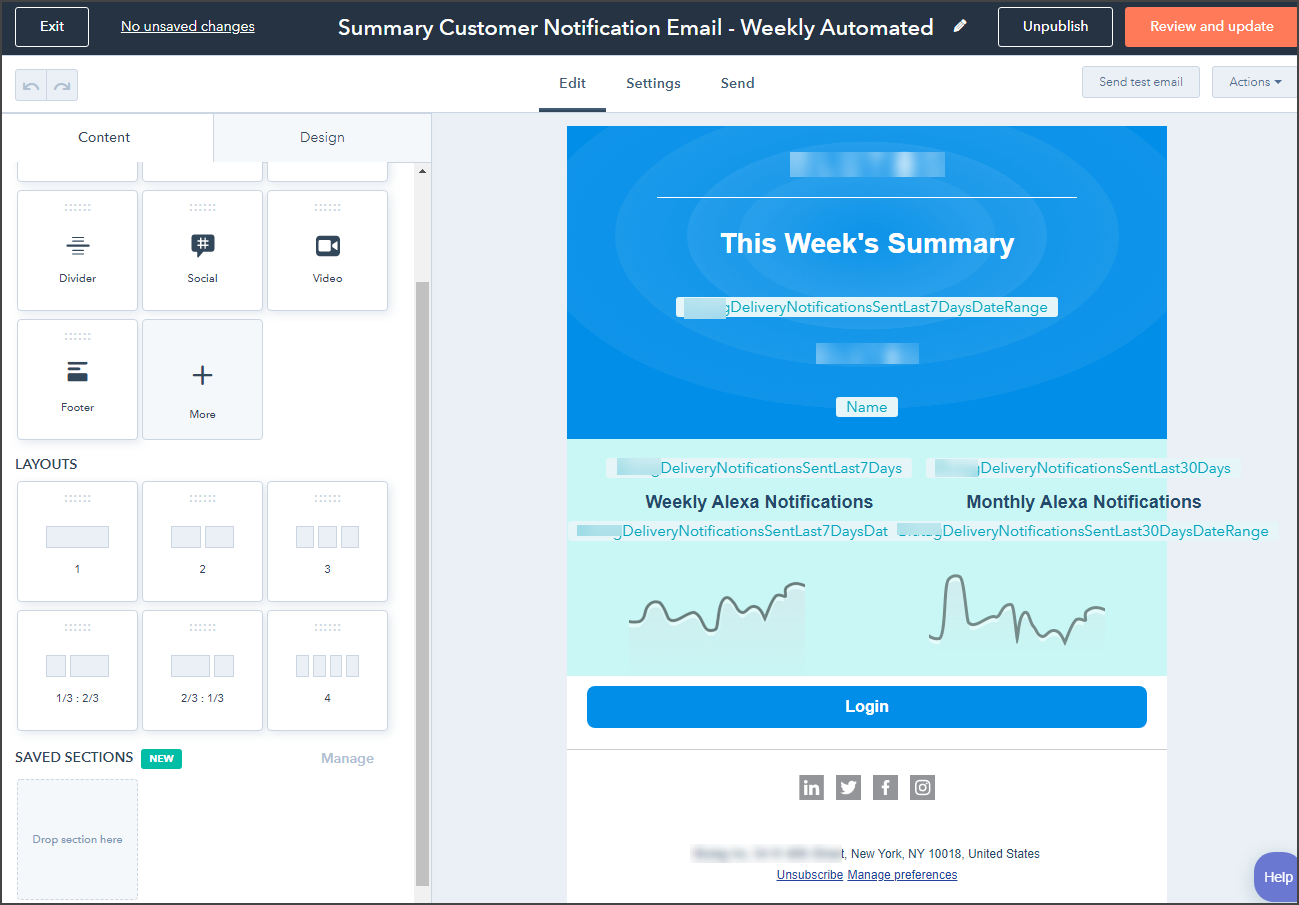
Your new email needs to include properties that will have updated information based on the cadence of your email send campaign. A weekly email needs updated data every week (to state the obvious).
Below is an example drag and drop email built-in HubSpot.
Sample GreenCo HubSpot Email With Properties
Step 2 - Create a notification property at the contact level.
Set up a property to trigger the emails. We call ours ‘Reset Weekly Notification Date.” It is a date picker HubSpot property.

Step 3 - Create a list of the contacts that are to receive the automated email notification.
Create a HubSpot contact list and select contacts to receive your periodic email. Perhaps this is all contacts where Lifecycle Stage = Customer.

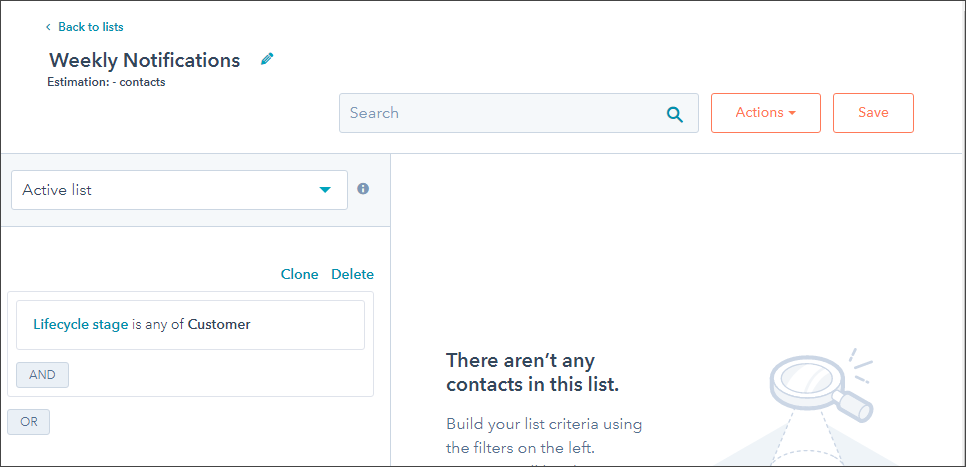
Another essential point: ensure these contacts are set to “Marketing Contacts” so they can receive your notifications.

Step 4 - Setup 2 workflows to trigger the emails.
Workflow #1 - Reset Contact Notification Email Date
At first, we believed we could utilize the Workflows Settings Specific Times date feature to have the “send email” workflow run weekly on, say, on Monday at around 6 AM.

There are odd reasons this did not work and nearly drove us insane at a certain point. We won’t get into it. Suffice it to say, triggering a “Send an Automated Email” Workflow on a specific date and time utilizing the Specific Times Setting is not safe for email automation and will only work some of the time. 😭
Here is what we did using clues in the HubSpot Community.
- Workflow #1 creates a property update trigger
- Then Workflow #2 sends emails based on that property being updated and re-enrolls your contacts in Workflow #1.
- Workflow #1 waits a certain amount of time to update the trigger property.
- Back to Step 2
You can see we have 35 contacts waiting in the middle of Workflow #1 to trigger setting the “Reset Weekly Notification Date” property.
The wait time you set up is the time between emails.
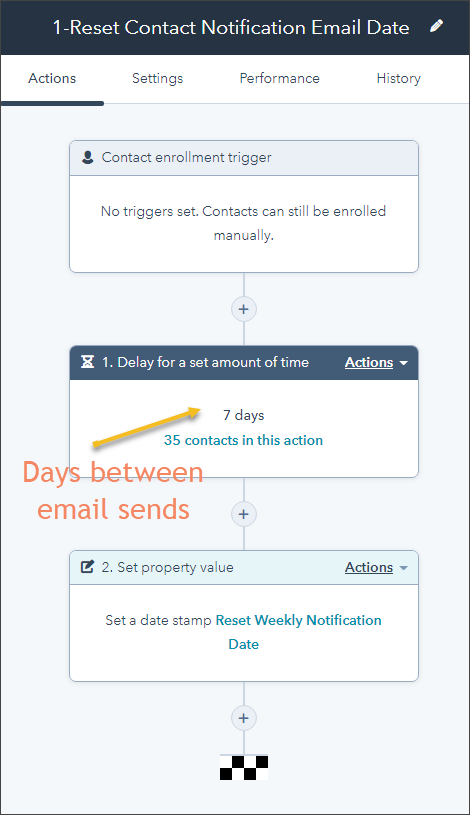
You must ensure this workflow has “Enrollment Trigger” Re-enrollment Trigger set to “Allow.”

Workflow #2 - Customer Notification Emails
Next, set Workflow #2 to send the email. This workflow triggers when the “Reset Notification Date” is known. “Known” includes anytime a property has been updated. HubSpot should re-enroll a contact when the property value is updated AND when the property is selected for re-enrollment.
- Workflow #2 sends the email and enrolls the contact into Workflow #1
- Workflow #1 waits the specified amount of time before changing the enrollment property again.
- Which triggers Workflow #2, and so on.
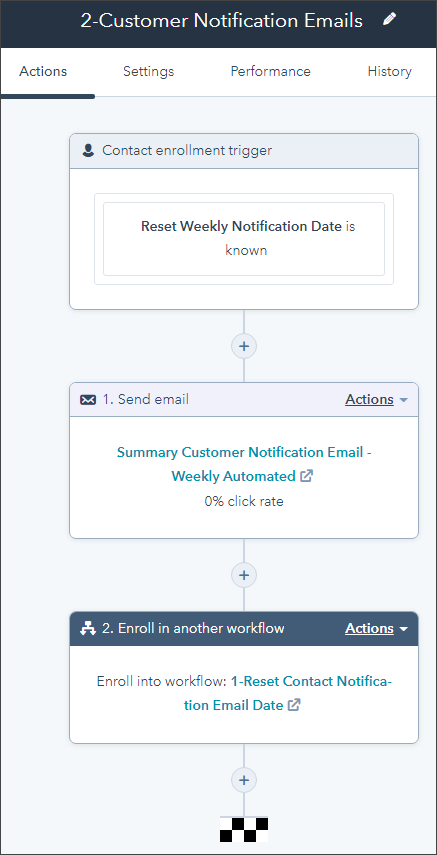
Again, it is super important that the “Re-Enrollment” boxes are enabled.

Step 5 - Test your workflows.
Testing your automated email process can be tricky. Do not turn on your new workflows until testing is completed. ✋ Here is what we did to try it out:
- Pick a couple of friendly contact records
- Clone Workflow #1 and Workflow #2
- Set your wait time in Clone Workflow #1 to a smaller amount of time, like one (1) day
- Ensure your Clone Workflow #2 is enrolling your contacts in your Clone Workflow #1
- Manually edit your trigger notification date property on your two test records to the current date.
- Revising this date will kick off the email send in Clone Workflow #2
- Both contact records should then sit and wait for a day in Clone Workflow #1
- Ensure you see an email come every day before turning off your test workflows and proceeding with Step 6.
- We had to set a calendar notification to make us check every morning! 📅
It’s a pain, but it is worth it to guarantee that this automatic email send will happen exactly as you desire.
Step 6 - Kick-off!
You have two options to kick off the workflow.
First (and maybe most important), turn off your test workflows and turn on your production workflows.
Option #1
You can kick off the workflows on the date and time of your choice by selecting all the contacts in your list, literally on the physical date and time you want the email to start, and manually editing the property “Reset Notification Date” to the current date.
Manually editing the “Reset Notification Date” property will kick off Workflow #2, which sends the email. Then it enrolls the list into Workflow #1 where they will wait X number of days to update the trigger property and send the email again.
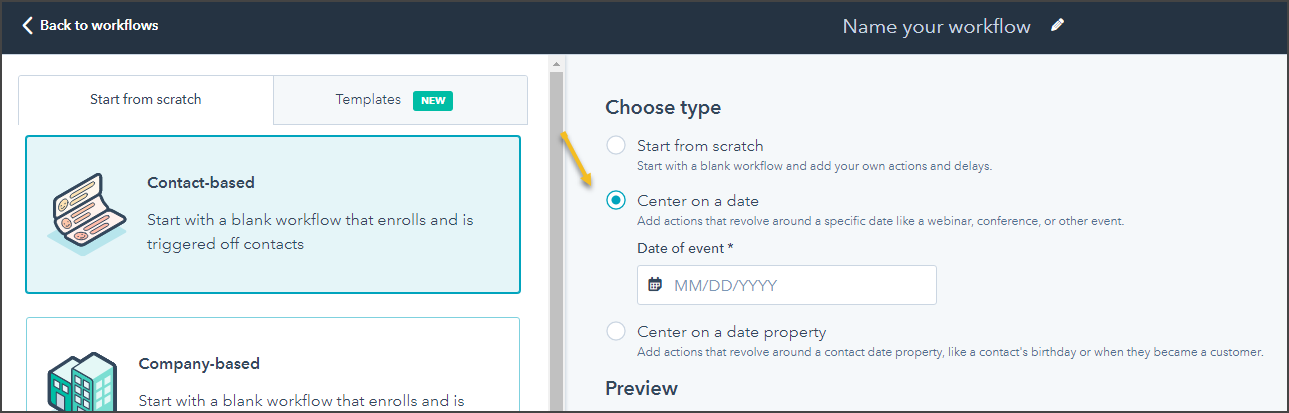
Option #2
Or you can set a one-time use workflow to trigger the process by using a workflow centered on a date property:
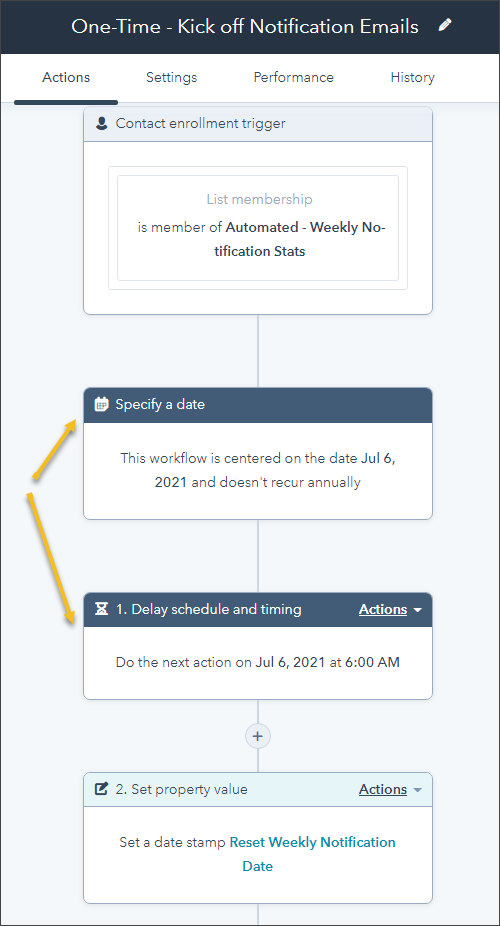
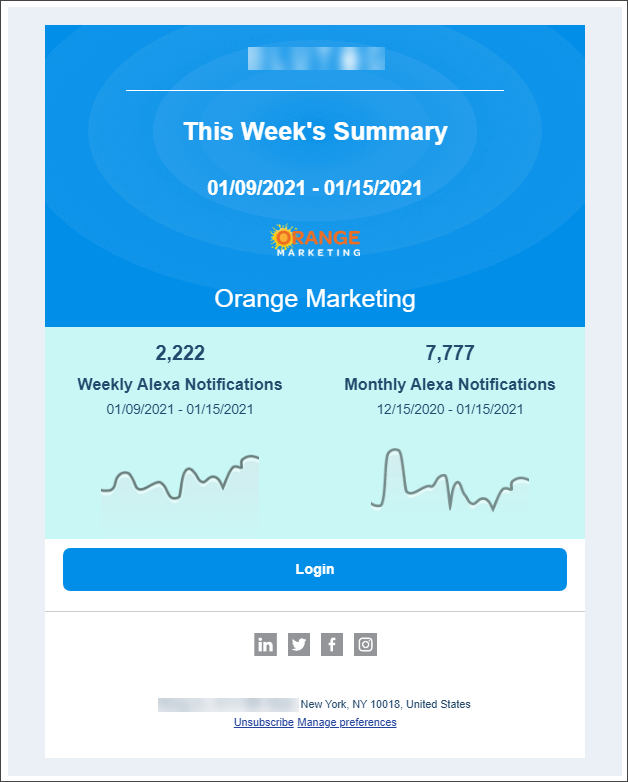
Result
And the result is a weekly email to customers with up-to-date information from Greenco’s Software as a Service application. 🎇🧨🎆
Final GreenCo Email With Personalized Fields including Personalized Logo!
Bonus: Personalized Images in Emails
If you want more information on how we included personalized data in this email, like the personalized customer image logo, read more here!

HubSpot Migrations By A Diamond Partner:
- Salesforce to HubSpot
- NetSuite to HubSpot
- Microsoft Dynamics to HubSpot
- Marketo to HubSpot
- Eloqua to HubSpot
- Pardot to HubSpot