Top HubSpot Updates for the past week ending June 10, 2024:
- Set validation rules for HubSpot default properties
- Files AI Data Extraction
- Lead Scoring
Set Validation Rules for HubSpot Default Properties
You can now set validation rules for specific default properties in HubSpot's Smart CRM.
Validation rules help maintain consistent and accurate data in the CRM. When validation rules are set for a property, users must meet the property’s requirements in order to save a value.
For example, you may want to ensure that the postal code is a number with a maximum of 5 characters, that the Deal Amount is a number, or that the Contact First Name doesn't exceed a certain character limit.

How Does It Work?
Object Settings > Properties > Edit Property > Rules > Select Validation Rules
You will be able to set validation rules for the following default properties:
Company
- Street Address
- Street Address 2
- Annual Revenue
- City
- Country/Region
- Country/Region Code
- Employee range
- Company name
- Number of Employees
- State/Region
- Postal Code
Contact
- Street Address
- Annual Revenue
- City
- Company Name
- Country/Region
- First Name
- Industry
- Job Title
- Last Name
- Message
- Salutation
- State/Region
- Postal Code
Deal
- Amount
- Closed Lost Reason
- Closed Won Reason
- Deal Name
- Next step
Ticket
- Ticket name
Files AI Data Extraction
Assets stored in the Files tool are used in emails, social media, content marketing, sales, etc. The actual contents of each file have not been available until now, and they are valuable data.
This initiative aims to scan public files for descriptions and tags that describe the contents of the file and, in some cases, provide excerpts or transcripts. We can then expose the data to other parts of HubSpot to supercharge content creation and management. This will essentially enable the contents of a file to be translated into a readable and searchable database for several tools to leverage within a portal.
How Does It Work?
You can enable this feature by going to AI Assistants under portal Settings.
Customers will NOT be automatically opted-in to this analysis, an admin must give consent on each portal to enable this tool. Only files marked as public and hosted on the Files tool will be scanned. We do not recommend storing files containing sensitive information in the Files tool.
Lead Scoring
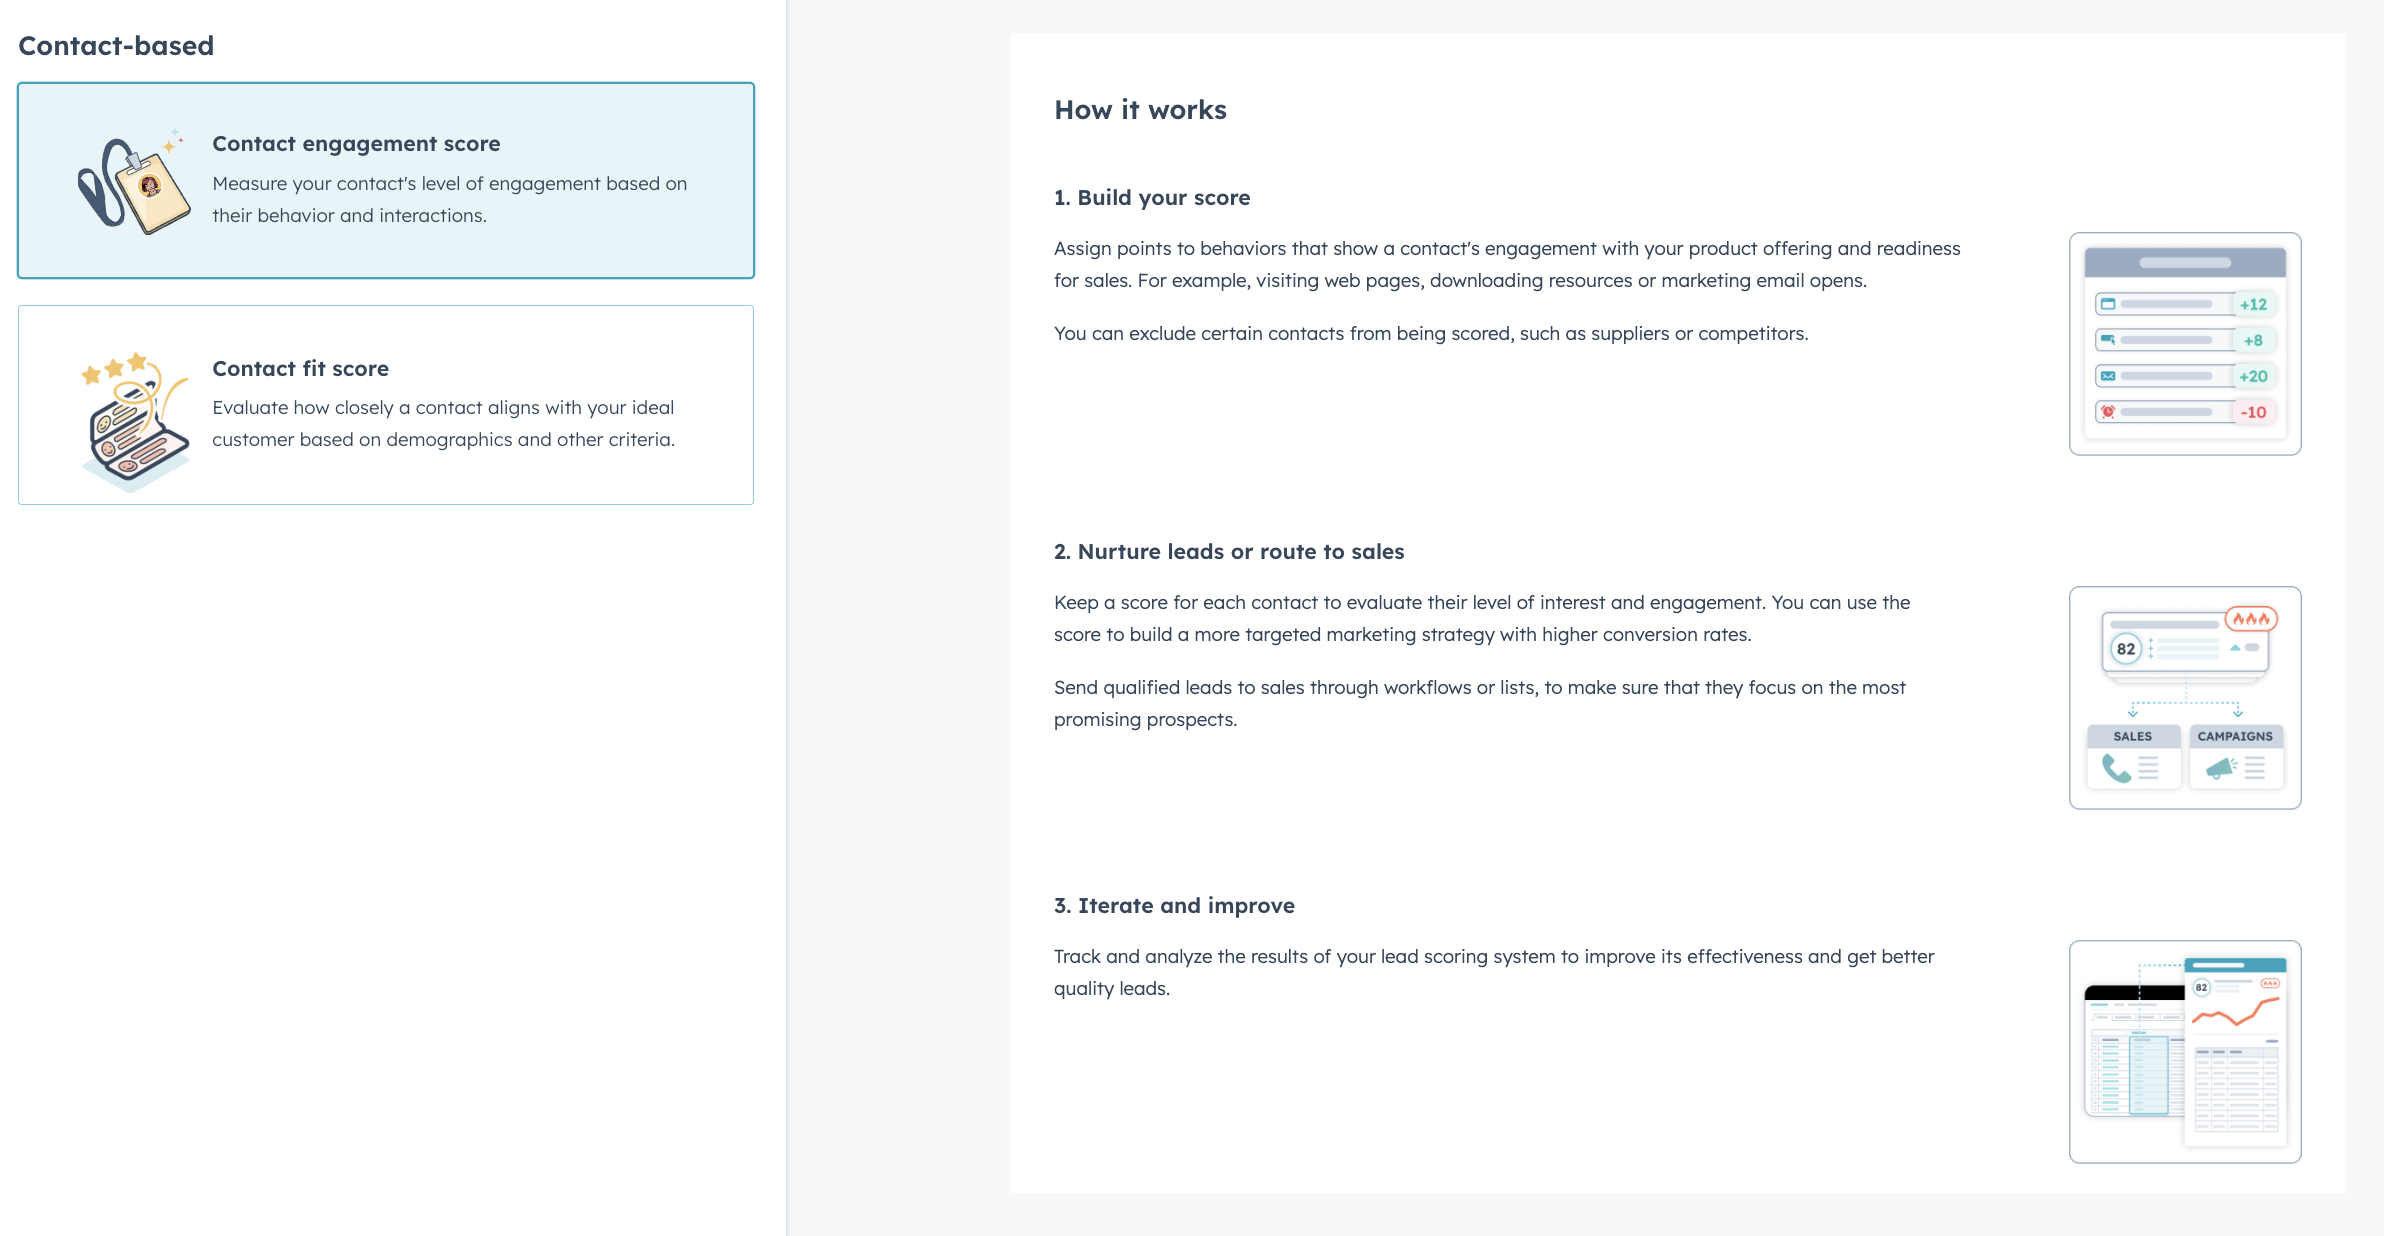
Lead Scoring empowers you to build scores in order to easily identify and prioritize your most promising leads at scale. It offers a flexible and powerful scoring solution to understand which leads are worth focusing on by your Marketing and Sales teams:
- A score builder that offers all the flexibility you need to build the right score for your business based on your leads' behavior, campaign interactions, and demographic data.
- Ability to create both engagement scores that measure the contact's level of engagement, based on their behavior and interactions, as well as fit scores that measure how well aligned a contact is with your ideal customer, based on their demographic or firmographic criteria.
- Score reporting that provides insights into the key factors contributing to a specific score and how a contact's score evolved over time (soon).
How Does It Work?
- Navigate to Marketing -> 'Lead Scoring.'
- To create a new Audience, click 'Create a score.'
- Now you can select which type of score you want to create:
- a contact engagement score measures your contact's level of engagement based on their behavior and interactions
- or a contact fit score measures how well aligned they are with your ideal customer based on their demographic or firmographic criteria
- Finally, click 'Create a score'.

- On the next screen, you can start selecting events and properties to build your score:
- Events such as CTA clicks, marketing email opens, or form submit for your engagement scores,
- or contact properties such as annual revenue, company size, or location for your fit scores.
- Once you select an event, you can then decide the amount of points a particular event or a group of events should get.
- All events add up to a default of maximum of 100 points but you can increase it as needed.
- For engagement scores, you can also select if you want to score it every time an event happens or limit it to a specific amount of points.
- Also, for engagement scores, you can set a score decay, which means each event's score will automatically reduce over time by the % you set. This is useful if you want to ensure the most recent engagement is scored higher than the engagement that occurred in the past.
- Once you're finished building your score, click on 'Review and turn on'.
- On the next screen, you can set up exclusions of contacts you don't want to score, as well as customize the property the score will be written to.
- Once you turn on the score, we'll start calculating the value for all your contacts, except the ones you've chosen to exclude, and writing it into the property you've set up.
- After that, you can start using your score, e.g., in workflows or lists.
That's All For this Week
Thanks for making it to the end of our recap for this week! These updates include some interesting features that we are excited to see in action, and we hope you have success implementing them in your HubSpot account.
If you would like to learn more about all of the updates from this past week, you can! Log in to your HubSpot account, click on your profile in the top right to open the drop-down menu, and then click on "Product Updates". There, you will see all of the live updates, as well as those that are on the way!

Get Help From HubSpot Experts
Looking to transform your business with HubSpot?—we are rated 5 out of 5 by over ninety satisfied customers! Contact us today for a free consultation and unlock the full potential of HubSpot to drive your growth engine forward. We'd love to help you!
