While the world slows down for the holidays, HubSpot keeps the momentum going! This week, we’re back with a fresh roundup of the latest updates to help you get even more out of your HubSpot. Let’s dive into what’s new!
Here are the Top HubSpot Updates for the past week ending December 23, 2024:
- Record ID Mapping in a data sync connection,
- Create 'Time Since' and 'Time Until' properties,
- Content Scaffolding in Custom Templates.
Record ID Mapping in a data sync connection
The data sync engine powers over 110+ HubSpot built integrations in the marketplace, and it is through a process called "field mapping" that you can define what gets synced between HubSpot and those other apps.

Many users have wanted to include the record ID as part of an active field mapping. However, our data sync engine for the longest time has suffered from a limitation in that it could not reliably sync back a record ID once it has created or paired up to a record on the other side. Our sync engine relies on data that changes to make the sync work... And it so happens that record ID's are as static as can be!
More than just record ID's, this limitation prevented field mappings of any data that gets set upon creation of a record, like for instance a 'product URL'.
We have now upgraded our sync engine to do away with this limitation, making it possible to set up a one-way field mapping of the record ID (custom field mapping required as part of Operations Hub Starter).
This applies both to getting the HubSpot record ID synched to your other app, as the opposite use case: telling HubSpot what remote ID is actively syncing towards its counterpart in HubSpot.
How does it work?
The record ID of HubSpot can be found for all objects inside of the right dropdown inside of field mapping. The remote app's record ID, sometimes called GUID, can be found in the left dropdown.

It is not possible, nor would it make sense, to attempt to map these directly with each other. Choosing to map a record ID will always result in a one-way field mapping towards the other side - you would need to create a new property to store the "other ID".
Create 'Time Since' and 'Time Until' properties
Users can now create two new types of calculated properties in their CRM:
- Time since, which displays the time past.
- Time until, which displays the time remaining.
These properties will display the time since or the time until today, another date, or datetime property.

How Does It Work?
Users can find these new calculated properties through the following paths:
- Object settings > properties > create property > field type > calculation > time since
- Object settings > properties > create property > field type > calculation > time until

Once you have selected ‘time since’ or ‘time until’, choose a custom date, default date, or datetime property as the input. Once this property is created, you cannot switch between time since and time until calculations.
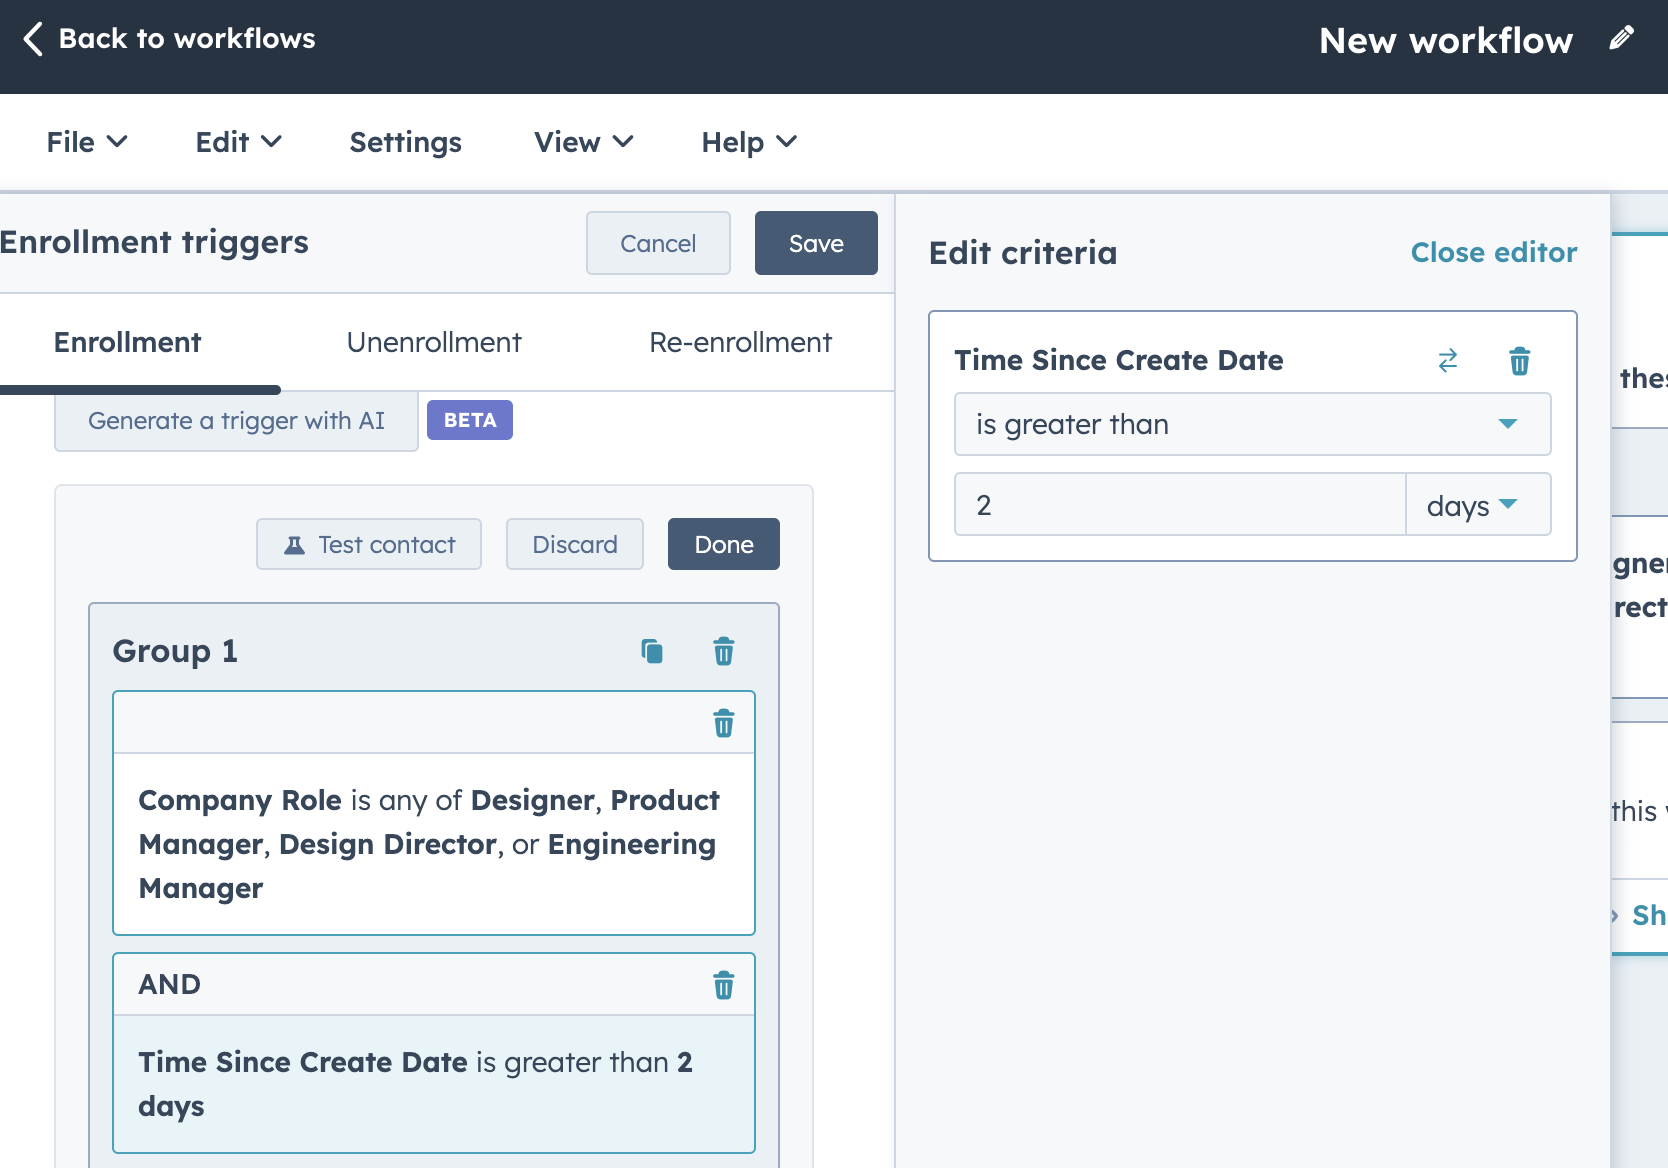
For example, if you select ‘create date’, the newly created property will display ‘time since create date’ as its value. This value can be negative or positive. If the date selected is after today, ‘time since’ would display as a negative value.
You can filter on 'time since' and 'time until' properties in the following places:
- Index Page

- Report builder for single object reports

- Reports list (for portals participating in the CRM Filtering in Reports beta)

- Single report viewer dashboard (for portals participating in the CRM Filtering in Reports beta)

- Lists

- Workflows

Notes:
- Time since and time until properties cannot be used in calculated properties or as the inputs in rollup properties. They can be used in sync properties.
- You will be able to filter on 'time since' and 'time until' properties using the following operators:
- Value is less than
- Value is greater than
- Value is known
- Value is unknown
- These properties are not yet supported on Mobile.
- These properties will not be supported in the datasets tool.
- You will not be able to create custom field mappings for these properties.
Content Scaffolding in Custom Templates
Content scaffolding gives you control over how generative AI tools add content to your templates. It lets you custom-define the template schema, specifying how different sections of the template should be used and what types of content they should contain.
Why does it Matter?
Content scaffolding allows you to define sections within your content templates that can house AI-generated content. This lets tools like content remix know how to construct content like landing and website pages so that the generated content matches the template's layout. As a result, you can use AI to generate page and email content that matches your organizations' branding—without having to copy and paste content.
How Does It Work?
Using content scaffolding, you can define places in a page template where HubSpot can insert AI-generated content. When a user generates AI content for a page that uses a scaffolded template, HubSpot will review the theme's scaffolding schema and template configuration to generate and insert more accurate content. Currently, scaffolding only works with the content remix feature.
Adding scaffolding to a template is a two-part process:
- First, you'll create a JSON config file that defines scaffolding fields where AI-generated content should be inserted, along with the type of content to insert.
- Then, you'll update the template to reference the schema and include scaffolding variables as needed.
Our developer documentation will provide full instructions on creating JSON config files.
Preview Scaffolded Templates in the Design Manager
After updating your theme and template files to support content scaffolding, you can preview and test how your files will behave with generated content.
To Use:
- Navigate to your updated page template in the Design Manager.
- Select Preview > Live Preview with Display options.

- From the Preview screen, provide a prompt in the Preview Scaffolded Content section on the left-hand side of the screen.
- Note: for general testing and debugging, a generic prompt that describes the type of content users in your account may regenerate will work well. For example, if you want to see how a landing page template will look once a team member creates a page from it in Content Remix, you may use “This is a landing page for an upcoming promotion of Product A for Customer Persona B” as your prompt.
- Note: for general testing and debugging, a generic prompt that describes the type of content users in your account may regenerate will work well. For example, if you want to see how a landing page template will look once a team member creates a page from it in Content Remix, you may use “This is a landing page for an upcoming promotion of Product A for Customer Persona B” as your prompt.
- Select “Generate”
- Your template preview will reload with AI-generated content populating your scaffold-compatible modules and fields.

For further debugging, you can use the “View raw generated content” option in the bottom lleft-hand cornerof the preview side panel. This will allow you to see each field on the page and how content is generated for tit
Start the New Year Strong With a HubSpot Tune-Up
The New Year is right around the corner, and there’s no better time to set yourself up for success in 2025. Why not start the year strong by bringing your HubSpot to life? Whether it’s refining your workflows, launching impactful email campaigns, or setting up insightful reporting, we’re here to help you turn HubSpot into a powerful growth-driving machine.
Here’s how Orange Marketing can help:
- CRM Setups and Migrations – Get your data organized and your processes running smoothly.
- Email Campaigns – Craft strategies that truly engage your audience.
- Workflows and Automation – Save time and increase efficiency with smart automations.
- Reporting and Analytics – Make data-driven decisions with confidence.
Don’t wait to get started. Contact us today and let’s kick off 2025 with your HubSpot working harder—and smarter—for your business!
