Orange Marketing
%20(44).png)
This week we continue to unpack some of the many HubSpot updates that came out around and during UNBOUND earlier this month. There is plenty to talk about, and you can learn even more by attending our official recap this Friday: UNBOUND UNPACKED - Live Briefing, were we share our takeaways, and break down which new HubSpot features are worth paying attention to.
Until then, here are our favorite updates for the week of September 28, 2026:
- Payment Plans for Standalone, One-time Invoices,
- Ticket reopening management in Help Desk, and
- Cell Selection on CRM Index Pages.
Payment Plans for Standalone, One-time Invoices
Merchants can now split an outstanding invoice into up to four scheduled installments, collected automatically after the buyer completes checkout on the first payment. The full balance stays on one invoice record, and each installment is tracked and charged independently.
Until now, merchants who wanted to offer installment-based payment on an invoice had no native option. The most common workaround was repurposing subscriptions as payment plans, which fragments accounts receivable across multiple records, misrepresents revenue on the books (a $10,000 deal split into 10 subscription installments shows only $1,000 at a time). Payment plans keeps the full balance on a single record, collects each installment automatically through a connected payment account, and gives both seller and buyer a clear schedule of what is owed and when.
How does it work?
Creating a payment plan
- Open an invoice with an outstanding balance and one-time line items
- In the invoice editor, open the payment plan configuration modal
- Set the number of installments (two to four), the amount per installment, and the due date for each
- The total across all installments must equal the invoice balance due
- Save the invoice. The payment plan activates when the invoice is finalized
Note: Payment plans can be configured on draft invoices. The plan will not execute until the invoice is finalized. Installment due dates must be in the future at the time of finalization.
Note: Online payments must be enabled on the invoice. If "charge using stored payment method" is selected, the merchant must change the collection method before adding a payment plan. A disabled state with an explanation appears in this case.
Payment collection
- The buyer receives the invoice and clicks "pay now" to complete checkout on the first installment
- Checkout captures the buyer's payment method
- Remaining installments are automatically charged on their scheduled due dates using the stored payment method
- Each installment charges independently. A failed payment on one installment does not stop future installments from being attempted on schedule
Note: If a payment fails, the buyer receives a payment retry notification through existing Commerce Hub infrastructure. Each failed installment is retried separately; failures are not bundled together.
Note: The buyer-facing call to action shows "pay now" before checkout and "payment scheduled" after the payment method is captured.
When the invoice balance due changes
If the invoice balance changes while a payment plan is active (for example, a credit memo is applied, a manual payment is recorded, or a line item is edited), the system pauses all future auto-collection until the merchant takes action.
Via the invoice editor
- Save is blocked until the invoice balance and payment plan are reconciled
- Installment amounts adjust automatically to match the new balance, and the changes appear in a confirmation modal before saving
Via credit memos or manually recorded payments
- The plan pauses immediately
- The merchant returns to the payment plan modal to rebalance or cancel the plan, then explicitly resumes collection
Note: In-flight installments (pending or processing) resolve as-is when a plan is paused. Only future unattempted installments are affected.
Note: The paused state is visible on the rendered invoice with a banner indicating collection is paused.
Canceling a payment plan
- Open the payment plan modal and select cancel
- If no payments have been made, the plan is deleted entirely
- If at least one installment has been paid, paid installments are preserved and remaining installments are canceled
- Any active payment retry is canceled so the buyer cannot pay against a canceled plan
Viewing payment plan status
- The payment plan status appears on the invoice record with values: Active, Paused, Completed, Closed, or Canceled
- The rendered invoice displays the installment schedule, amounts, and status for each installment
- The invoice preview from associated objects shows payment plan existence, installment count, and plan status
Private Beta Limitations
- Available for standalone invoices with one-time line items only; recurring invoices are not supported
- Maximum of four installments per plan
- No automated email notifications specific to payment plans; merchants communicate plan details to buyers manually or by resending the invoice
- The buyer must go through checkout on the first installment to capture a payment method; charging a stored method without checkout is not supported
- Minimum installment amount is $0.50
- If the invoice balance increases after all installments are paid, the plan cannot be reopened
NOTE: this feature is currently available in private beta only.
Ticket Reopening Management in Help Desk
Ticket reopening management in Help Desk lets admins define what happens when a reply comes in on a closed ticket. When a customer replies on a closed ticket, this admin set configurable time window determines whether the original ticket reopens or a new one is created. This configuration is now available for Email, with support for other channels coming soon.
Why does it matter?
Previously, HubSpot treated all replies the same, with all customer responses reopening a resolved ticket. That skews SLA metrics, fills queues with noise, and brings resolved tickets back for no good reason. Now admins can set clear rules so only the replies that actually matter get attention.
How does it work?
When a reply comes in on a closed ticket, HubSpot first checks the sender:
- If it came from an automated sender, the message is logged quietly with no disruption to the queue.
- If it's a real customer reply, HubSpot checks it against the admin's configured time window.
- Replies within the window reopen the original ticket with full context intact.
- Replies after the window create a new ticket linked to the original, so no context is lost.
How to set up?
1. Go to Help Desk Settings (gear icon)

2. Click Ticket reopening (under Ticket sources and routing)
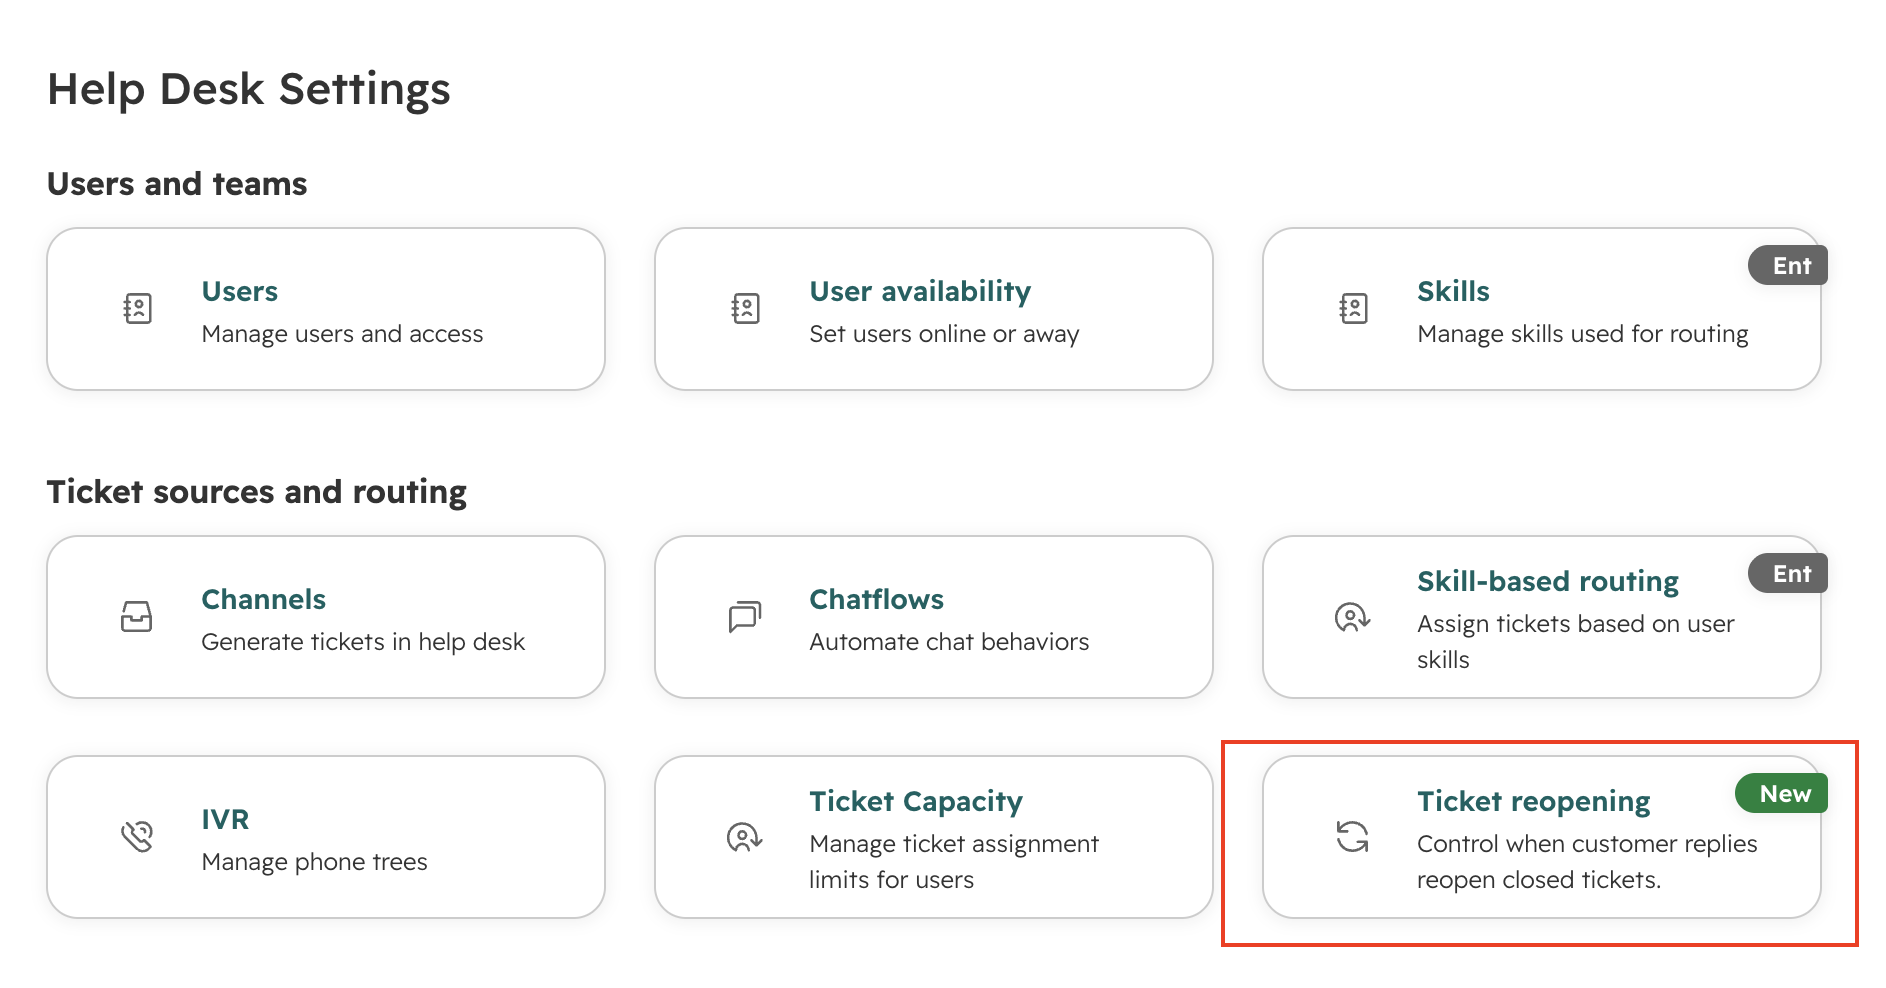
3. Choose your reopen window: Always reopen, a set time frame (3/7/30 days or custom hours), or Never reopen
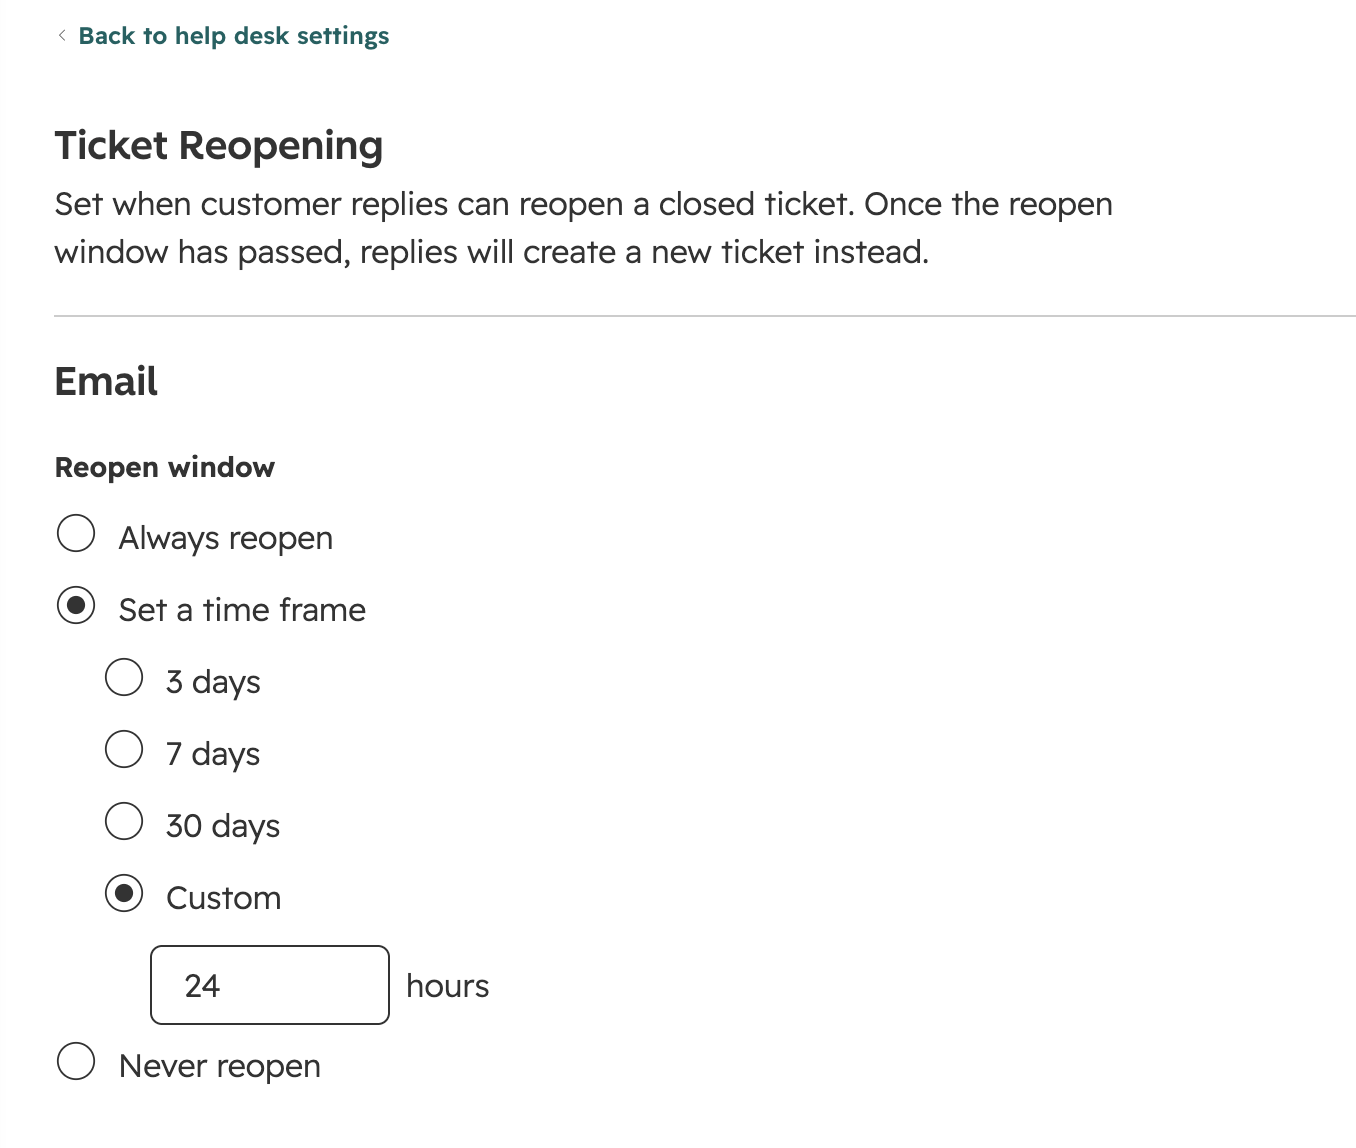
4. Click Save
Cell Selection on CRM Index Pages
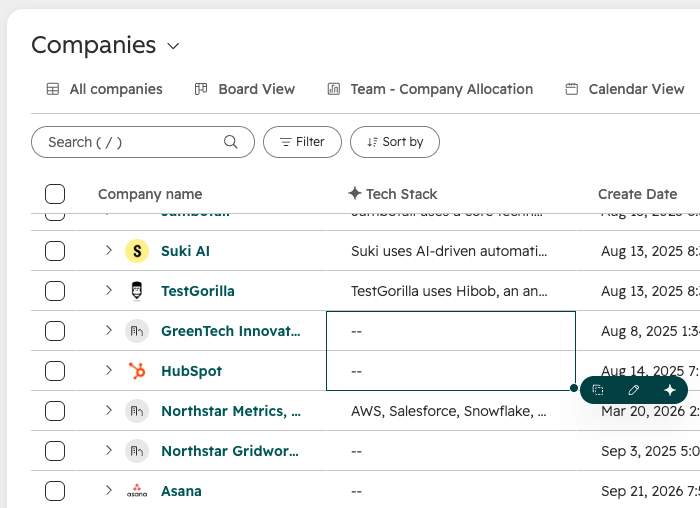
CRM Index cell selection is a new, flexible way to interact directly with your data inside the CRM index table view on Contacts, Companies, Deals, and other objects.
Instead of being limited to selecting an entire column you can now target a specific range or subset of cells across multiple rows and columns on your index table.
This update brings modern, spreadsheet-style interactions straight to your primary workspace, supporting three core actions on selected cells:
- Select: Target precise cells or custom ranges across your CRM index table.
- Copy: Highlight and copy specific cell data to paste into external spreadsheets, docs, or messages.
- Edit: Targeted bulk updates for just the selected cells in a single action.
- Fill with AI: Fill smart properties using Data Agent inline.
Why does it matter?
The CRM index table is where daily work actually happens, the place for reviewing, organizing, and acting on customer data. But when the table treats entire records as the only way to interact, simple tasks become more manual.
Cell selection bridges that gap by bringing the speed and fluid flexibility of modern grid tools directly into your CRM. It gives you precise control over your data right where you're working, allowing you to update exactly the cells you intend to touch without affecting the rest of the view. The CRM index feel less rigid, faster, and more intuitive.
How does it work?
On any CRM Index table view:
- Select Cells on the Index: Click and drag across the cells you want to highlight, or hold
Shiftwhile clicking to select a range. - Copy Data: Use standard shortcuts (
Ctrl + CorCmd + C) or the menu to instantly copy the highlighted values to your clipboard. - Edit in Bulk: Select a range of cells within a property column and update their values simultaneously in one click.
- Fill with AI: Select a range of cells within a smart property to run Data Agent with one click.
UNBOUND 2026 Was Big. Let's Break It Down.
Don't forget to sign up for UNBOUND Unpacked 2026, our LIVE briefing on this Friday. We’ll share what stood out to us in Boston, walk through the HubSpot announcements we think matter most, and talk about what these changes can mean for your team.