%20(25).png)
This week’s HubSpot updates are all about building smarter, faster campaigns and improving how teams execute and support them behind the scenes. From making it easier to duplicate and scale successful campaigns, to better connecting meetings and support workflows, these updates help streamline both marketing and customer experience efforts.
Whether you're looking to move quicker with campaign execution or empower your support team with more efficient tools, there’s a lot here designed to save time and improve performance.
Here are our top updates for the week of April 13, 2026.
- Campaign Cloning,
- Make Campaigns Automatable in Workflows, and
- Add Scheduling Pages to Campaigns.
Campaign Cloning
You can now clone an existing campaign in Marketing Studio - including its brief and most associated assets - and update key details in just a few steps.
Recreating a successful campaign from scratch takes time and introduces room for error. Campaign cloning lets you duplicate an existing campaign - including its structure, brief, and most assets - so you can adapt and relaunch repeatable programs without starting over.
How does it work?
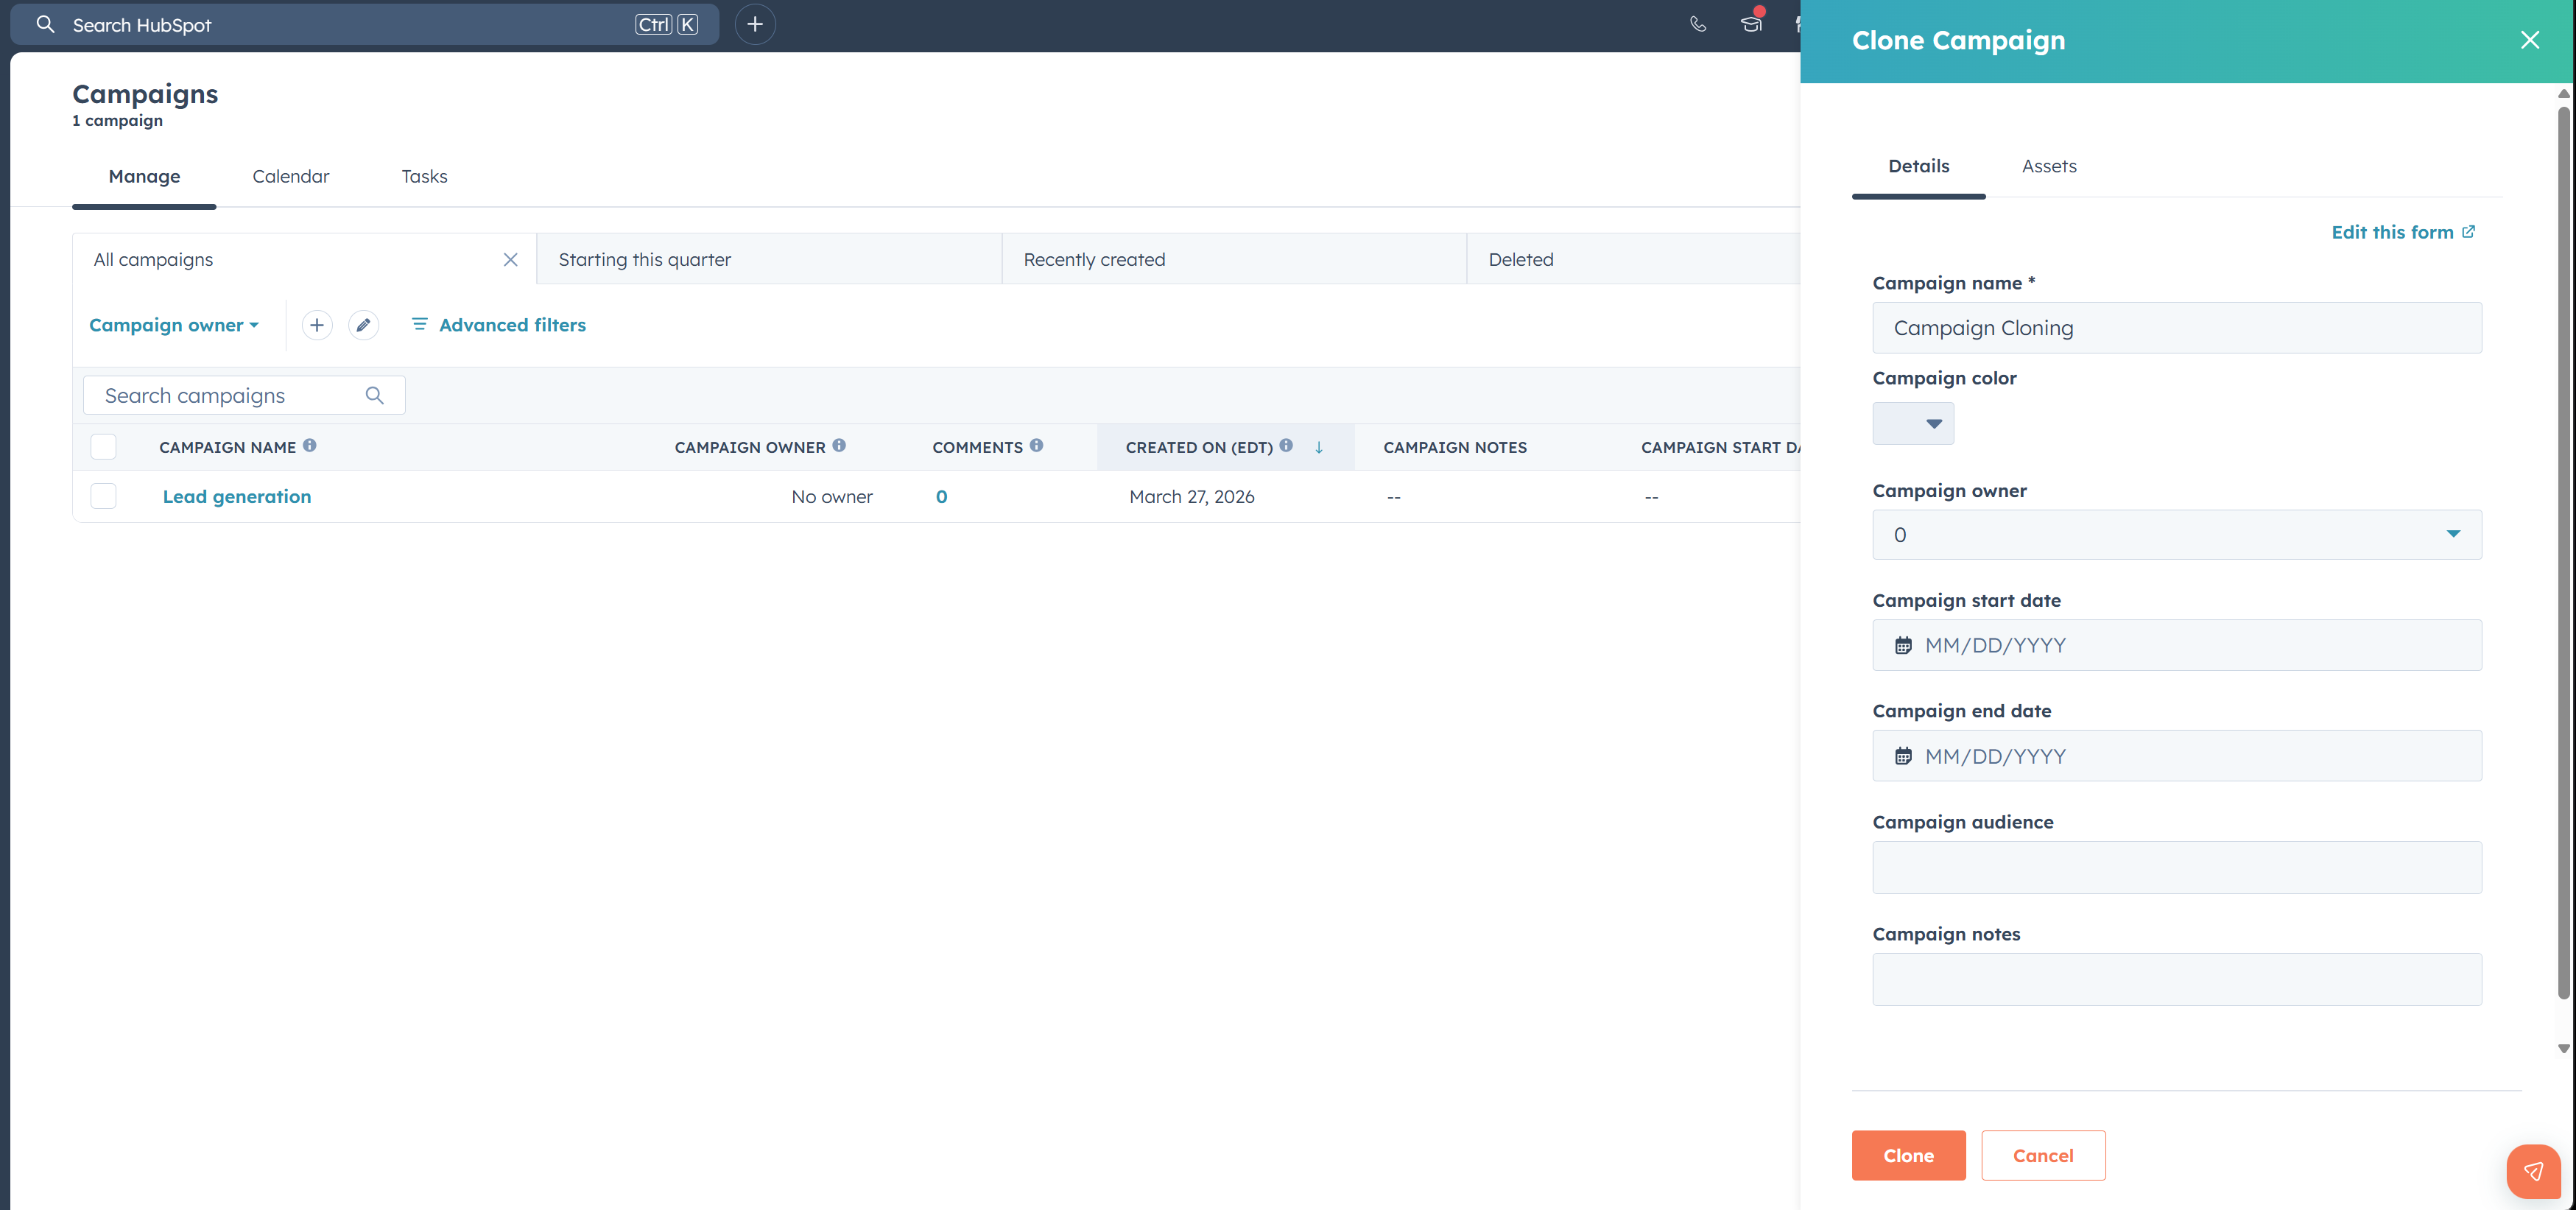
From Campaigns > Manage, select an existing campaign and choose Clone from the menu. Alternatively, you can clone a campaign from within an existing campaign by selecting the Clone button.
Cloning Process
In the right-hand panel, review and update your campaign settings, including the campaign name, owner, and start date. Using the checkboxes, select the campaign elements you want to include.
In the Assets tab, select the specific assets you want to clone. Selecting the Clone button copies the campaign and opens the Marketing Studio canvas with the newly created campaign.
Available asset types for cloning:
- Social Post/Social Broadcast *available to associate with multiple campaigns
- Marketing Email
- Landing Page
- Form
- Workflow
- Sequence
- List *available to associate with multiple campaigns
- Blog Post
- Web Interactive/Popup Form
- Website Page
- Call-to-Action (CTA)
- External URL *available to associate with multiple campaigns
- File *available to associate with multiple campaigns
- Marketing SMS
- Marketing Event
If a cloned campaign contains an asset type not yet available for cloning, you'll see an alert message.
Support Macros
Now supports configuring macro actions directly in macro settings via dropdowns, allows sharing macros with specific users or teams, adds macro filtering by team, and increases macro limits to 500 for Pro and 1000 for Enterprise portals.
Macros are a type of reply-driven automation that allow support reps to take multiple steps of the support process with a single click. When responding to a ticket, reps can simultaneously send a message to the customer and perform follow-up actions like updating the ticket status, changing the owner, updating the ticket priority, and more. This combines what previously required multiple separate clicks and steps into one streamlined workflow, dramatically reducing the time needed to handle each ticket.
Why does it matter?
Speed is critical for support teams, with the vast majority of customers saying they're more loyal to brands with fast response times. And with support reps handling increasing ticket volume and increasing customer expectations, it's more important than ever that they have the right tools to help them move quickly to handle customer issues. From troubleshooting, responding, updating, closing, and completing follow-up tasks, every click counts, and with macros, support teams can automate away that manual work and focus on solving for their customers.
How does it work?
Macros have two components: a message and follow up actions. These follow up actions can be configured with several default dropdown options in macro settings, and/or with a workflow. All macros can be managed and edited under help desk settings:
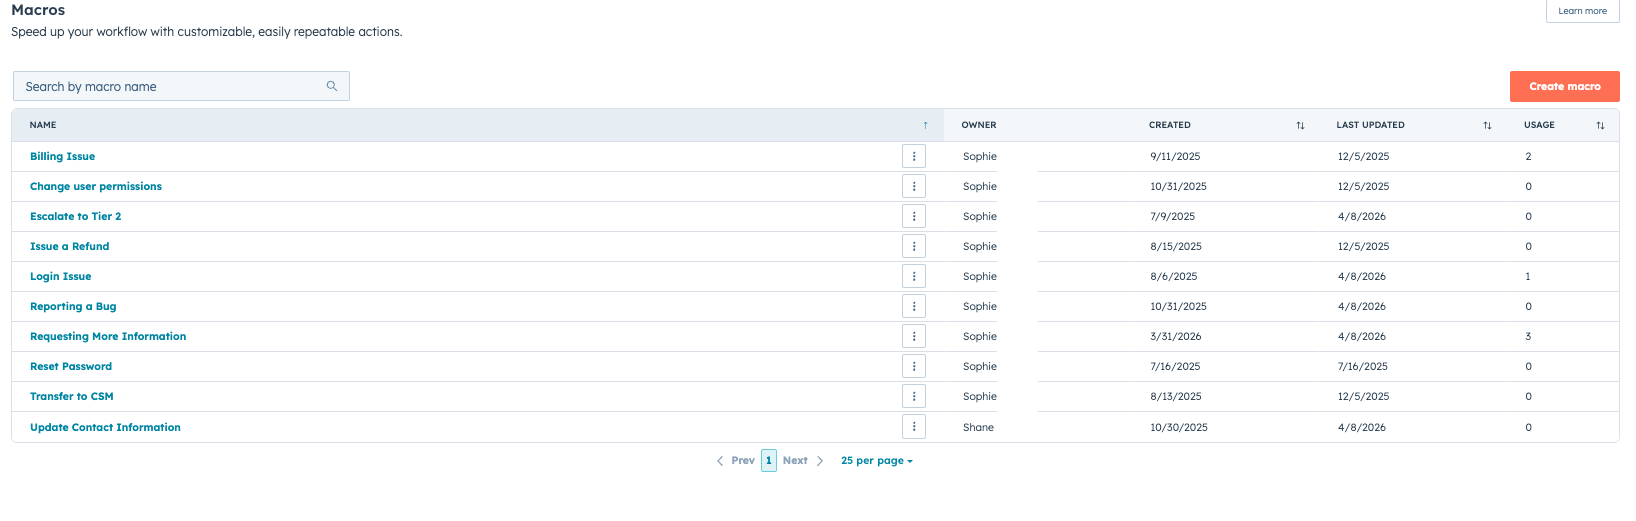
Create a macro
Users with admin permissions access can create a macro by taking the following steps:
- Navigate to Settings > Help Desk & Inbox > Help Desk > Macros
- Click "create macro"
- Give the macro a name and description (internal only)
- Add a macro message
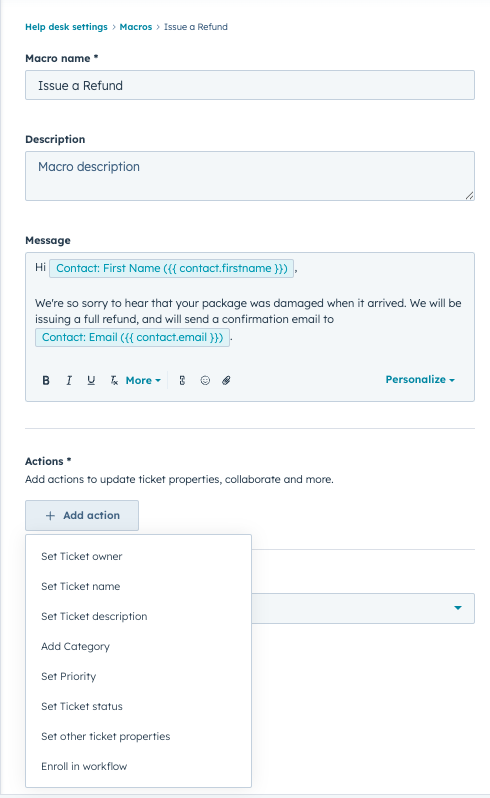
Choose the macro's actions. You can do this via the dropdown, a workflow, or both:
- Select an action from the dropdown:
- You can update the ticket owner, name, description, category, priority, or status using the built-in actions builder.
- You can also update any other ticket property, provided that the ticket property is editable (i.e. not a system property that is only updated by HubSpot), and that no field-level permissions are applied
- Enroll the ticket in a workflow:
- Select "enroll in workflow" to choose the workflow that will fire when the support rep hits send in help desk.
- Macros are only compatible with active, ticket-based workflows. Non-ticket based workflows will not appear here
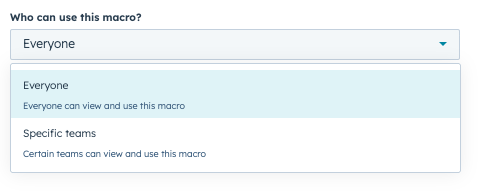
Manage sharing: you can choose to share a macro with "everyone" or "specific users and teams."
Apply a macro
- In the reply editor in help desk, click "macros" next to the send button
- Search macros by title
- Filter macros by "all" or "my team" (macros shared specifically with your team)
- Hover over the information icon on each macro to see the description
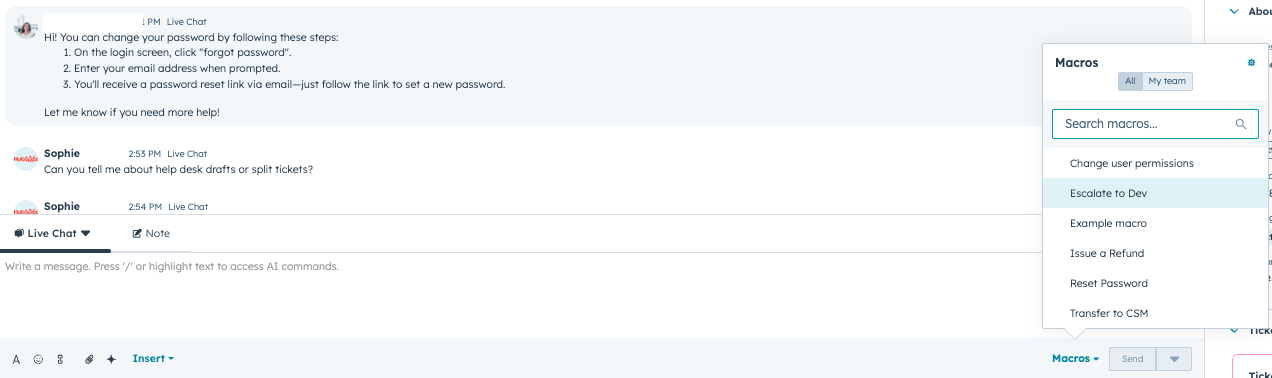
- Select your macro
- The content of the message will appear in the reply editor, and the actions or name of the workflow will appear below
- Click "send and apply"
- If you decide you do not want to use this macro after all, hover over the name of the workflow towards the bottom of the reply editor and click the "X" on the right hand side to remove the workflow.
Important notes:
- Macros are available to seated Service Hub Pro and Enterprise users
- Macros are only available in Help Desk and cannot be used in the inbox or CRM
- Service Professional portals can create up to 500 macros, and Service Enterprise portals can create up to 1000.
Add Scheduling Pages to Campaigns
You can now add scheduling pages as assets to a campaign. Any meetings booked through that page after it's added will be automatically associated with the campaign, allowing a more seamless way to attribute revenue to meetings booked.
Why does it matter?
Meetings are an important campaign touchpoint, but there's been no automated way to connect them to your campaigns. Previously, you had to manually sift through your meeting library to add relevant meetings one by one. Now, meetings are attributed automatically, giving you a more accurate picture of campaign performance without the manual work.
How does it work?
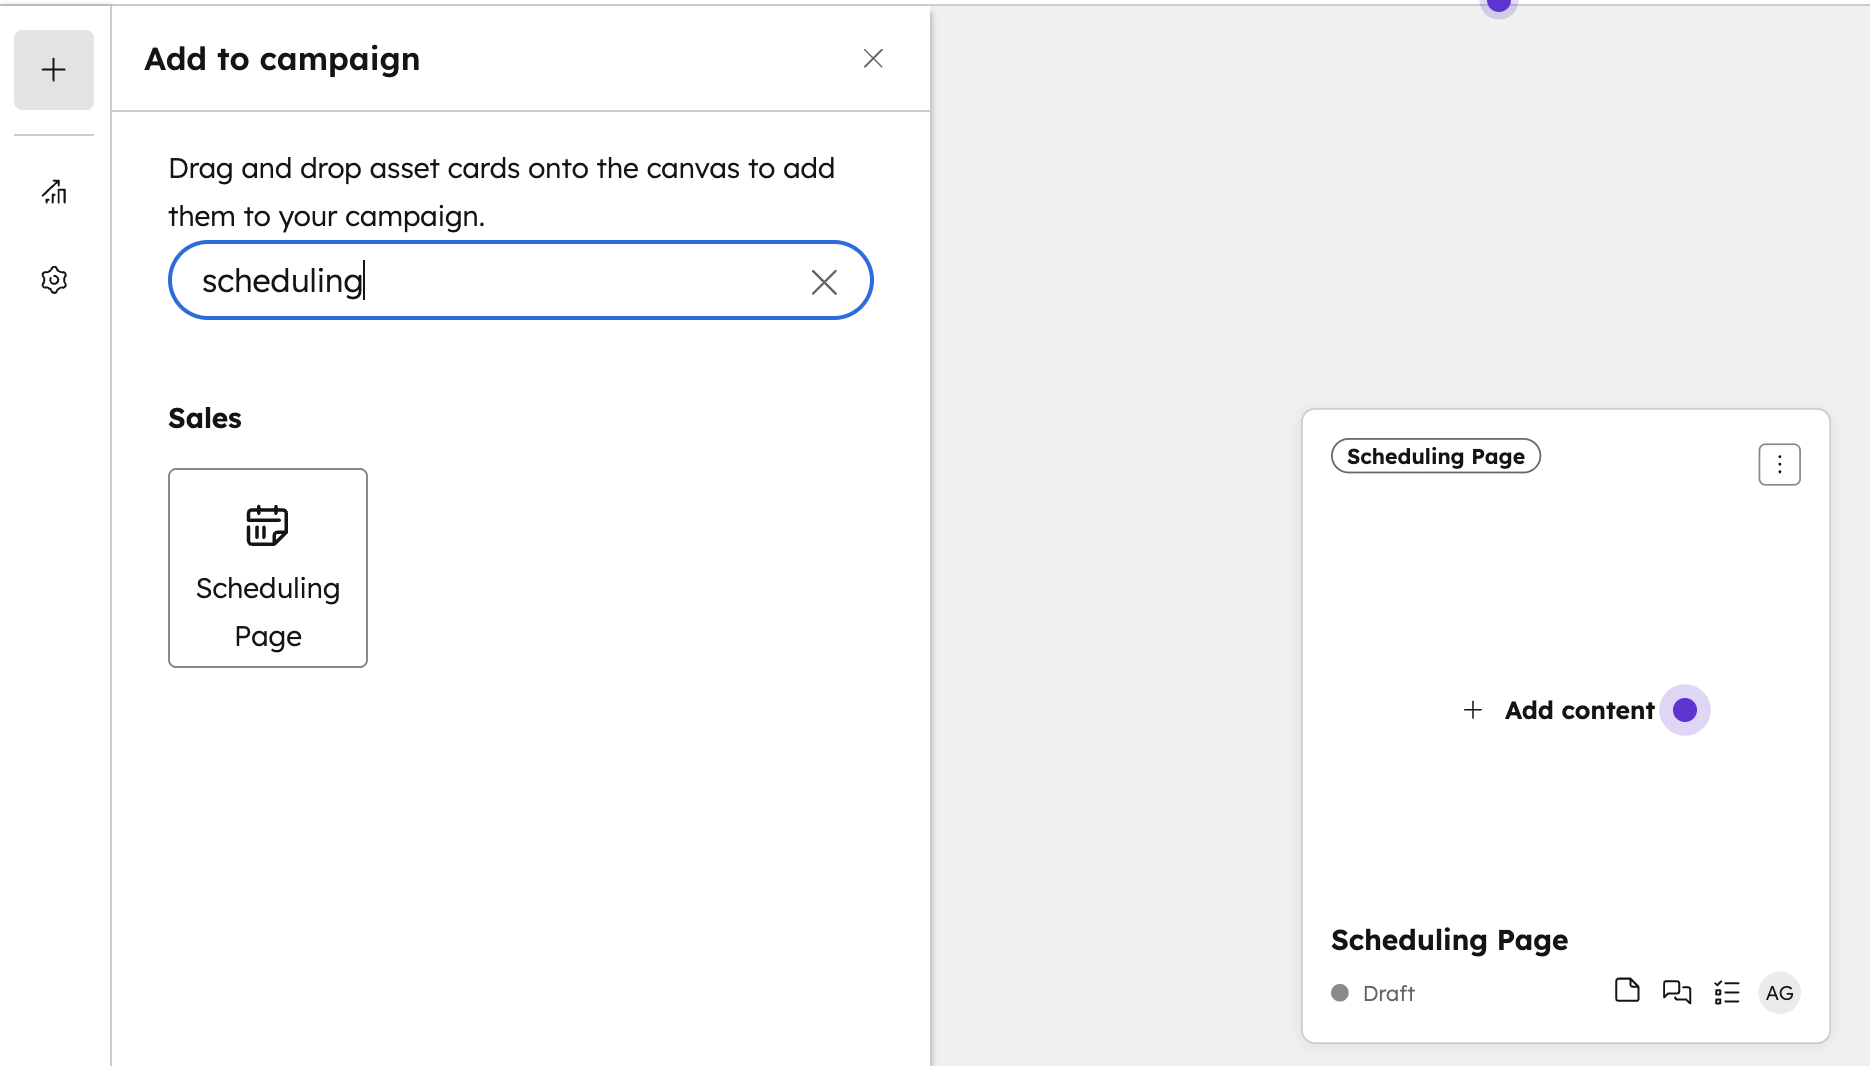
Adding a scheduling page to a campaign
- Navigate to your campaign or Studio canvas.
- Add a scheduling page as an asset (it will appear on the canvas).
- Any meetings booked on that scheduling page going forward will be automatically associated with the campaign.
A few things to note:
- Meetings booked before you add the scheduling page will not be retroactively added. Those still need to be added manually.
- If you remove the scheduling page from the campaign, previously auto-associated meetings will remain.
- You can add a scheduling page to multiple campaigns, and meetings booked will be associated to all of them.
Knowledge base article | Password: Campaigns_297887
Don't Miss What AI Is Saying About Your Brand
With HubSpot continuing to roll out smarter campaign and automation tools, it’s clear that AI is playing a bigger role in how brands are discovered, evaluated, and chosen, often before a prospect ever talks to your team.
If you want to understand how your brand is showing up in AI-driven experiences (and what you can do to improve it), now’s the time to take a closer look!
Join us this Friday for our webinar, What AI Knows About Your Brand, and see real insights and early results from B2B companies already adapting to this shift.